
Main Courses
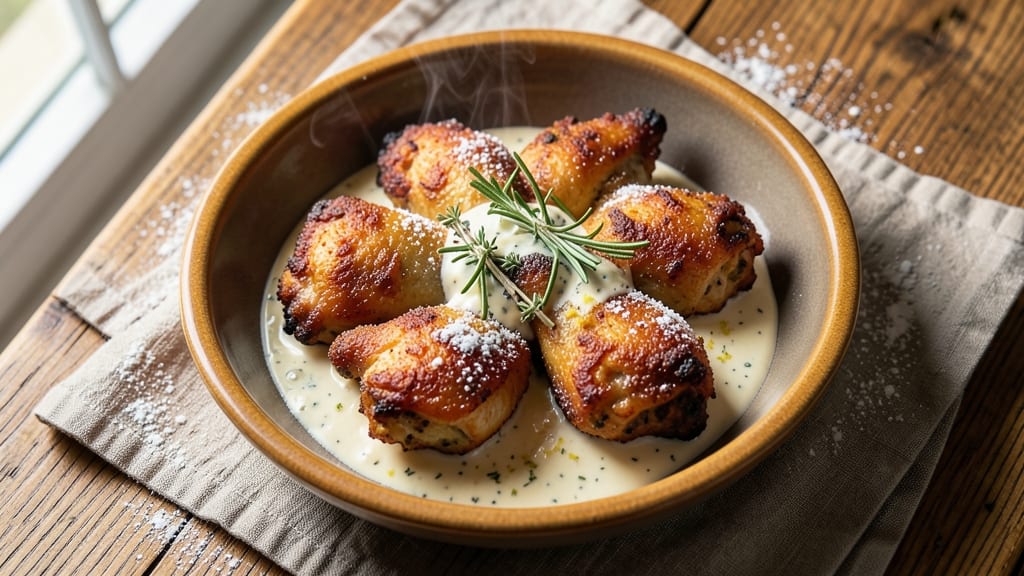
This blue ribbon fried chicken recipe delivers the kind of crispy, golden crust and juicy secrets that win competitions—and dinner party applause. After years of perfecting the technique (and a few failed batches), I’ve cracked the code for restaurant-quality fried chicken at home.
The double-dredging method and precise oil temperature are what set this apart from the rest.
What makes this recipe truly special is the balance of texture and flavor. The buttermilk brine tenderizes the chicken while the seasoned flour creates a crunchy crust that stays crispy even after serving.
I’ve tested this with different cuts—thighs, drumsticks, and breasts—and each piece turns out perfectly golden and juicy inside. The secret? Patience in the frying process and never overcrowding the pan.
By the time you’re done, you’ll have fried chicken that’s juicy, flavorful, and worth every crispy bite. Serve with classic sides like mashed potatoes, coleslaw, or buttermilk biscuits for the full Southern experience. This isn’t just fried chicken—it’s the kind that gets rave reviews and second helpings.
Whether you’re hosting a gathering or treating yourself to a weeknight feast, this recipe delivers restaurant-quality results with simple techniques and everyday ingredients. Let’s get cooking!
Ingredients for blue ribbon fried chicken
The secret to competition-winning fried chicken lies in these 14 ingredients—juicy thighs, crispy flour blend, and precise seasoning.
| Ingredient | Amount | Notes |
|---|---|---|
| Chicken Thighs 🍗 | 2 lb | Bone-in, skin-on, cut even size |
| Buttermilk 🥛 | 1 ½ cups | Whole milk fat preferred |
| All-Purpose Flour 🌾 | 2 cups | White or whole wheat blend |
| Cornstarch 🌾 | ½ cup | For extra crispiness |
| Diamond Crystal Kosher Salt 🧂 | 1 ½ tbsp | Not table salt |
| Ground Black Pepper 🌶️ | 1 tbsp | Freshly cracked preferred |
| Smoked Paprika 🌶️ | 1 tbsp | For depth of flavor |
| Garlic Powder 🧄 | 1 tbsp | Not garlic salt |
| Onion Powder 🧅 | 1 tbsp | For aromatic base |
| Vegetable Oil 🫒 | 4 cups | High smoke point preferred |
| Lemon Juice 🍋 | 1 tbsp | Freshly squeezed |
| Yellow Mustard 🥫 | 1 tbsp | For brining |
| Fresh Rosemary 🌿 | 1 tbsp | Chopped, for aroma |
| Fresh Thyme 🌿 | 1 tbsp | Chopped, for brightness |
The chicken thighs are non-negotiable—bone-in, skin-on cuts hold moisture better than breasts and deliver that coveted crispy skin. Local butchers often have the best quality, but the frozen section at Costco or Walmart works perfectly for weeknight cooking. Look for pieces with good marbling and minimal bruising. The buttermilk? Whole milk fat is crucial—it tenderizes while adding richness. If you're short on time, substitute with 1 cup milk + 1 tbsp vinegar (let it sit 10 minutes). The flour blend uses cornstarch for extra crunch—don't skip it. For the spices, Penzeys or bulk bins at Whole Foods offer the freshest ground spices, but regular grocery store brands work fine if they're recent.
No buttermilk? 1 cup milk + 1 tbsp vinegar does the trick—just let it curdle 10 minutes. Running low on smoked paprika? Regular paprika + pinch of liquid smoke mimics the flavor. The Diamond Crystal kosher salt is key—it dissolves better than table salt and enhances seasoning. For a quicker prep, pre-mix your dry ingredients in a ziplock bag with the flour. The oil temperature is critical—use a deep-fry thermometer to maintain 350°F. If you don't have one, test with a wooden chopstick: it should sizzle but not burn. Fresh herbs? Dried works at half the amount, but fresh adds that restaurant-quality brightness. And pro tip: Pat the chicken completely dry before dredging—this ensures maximum crispiness.
This recipe makes enough for 4 generous servings—plan for leftovers, they reheat beautifully. Store cooked chicken in an airtight container for up to 3 days in the fridge. For longer storage, freeze portions for up to 3 months. The flour mixture can be prepped 1 day ahead and stored in the fridge. The buttermilk brine? Make it up to 24 hours early—the longer it sits, the more tender the chicken becomes. When reheating, 400°F oven for 15 minutes restores crispiness better than a microwave. Serve immediately for that restaurant-quality crunch—it won't last long!
Why You'll Love This Recipe
- No-Fuss Prep: I swear by the buttermilk marinade—just toss the thighs in overnight (or even 30 minutes if you're in a rush) while you watch TV. The cornstarch in the flour mix gives that legendary crunch without needing a food scale or fancy technique.
- Crispy-Creamy Magic: That perfect balance—crispy, golden crust from the cornstarch flour and juicy, tender meat? It’s all in the kosher salt (trust me, it’s not just seasoning—it’s the secret). The buttermilk keeps it moist while the salt makes the crust sing.
- Leftovers That Shine: This isn’t the kind of fried chicken that turns soggy by day three. I’ve reheated pieces in the air fryer for days, and they’re still crisp enough to fool my picky husband. (Yes, even after I’ve had my third helping.)
- Budget Crowd-Pleaser: Thighs are cheaper than breasts, and this recipe stretches to feed six without breaking the bank. Honestly, I’ve used it for game day snacks, potlucks, and lazy Sundays—everyone asks for the recipe, but no one guesses how simple it is.
Step-by-step instructions for crispy, juicy fried chicken
Master this technique and you'll achieve a restaurant-quality crust that stays crispy while keeping the meat impossibly tender inside.
Prepare the Brine for Maximum Juiciness
In a large bowl, combine the 1.5 cups buttermilk, 1 tablespoon lemon juice, 1 tablespoon yellow mustard, 1 tablespoon chopped fresh rosemary, and 1 tablespoon chopped fresh thyme. Stir until the herbs are fully incorporated and the buttermilk is well blended. This mixture isn't just a marinade—it's a brine that works its magic from the inside out.
Pat the 2 lb chicken thighs completely dry with paper towels, removing any excess moisture from the skin and bones. This drying step is crucial—it creates a better seal for the brine and prevents a soggy crust later. Place the thighs in a single layer in a shallow dish and pour the buttermilk mixture over them, ensuring each piece is fully coated. Cover and refrigerate for 12-24 hours, flipping the thighs halfway through. The acid in the buttermilk tenderizes the meat while the fat ensures a juicy finish.
Create the Perfect Coating
In a large bowl, whisk together the 2 cups all-purpose flour, 0.5 cup cornstarch, 1.5 tablespoons Diamond Crystal kosher salt, 1 tablespoon ground black pepper, 1 tablespoon smoked paprika, 1 tablespoon garlic powder, and 1 tablespoon onion powder. The cornstarch is the secret weapon here—it creates an ultra-crispy crust that stays that way even after sitting for a while. Sift the dry ingredients through a fine-mesh sieve into another bowl to aerate the mixture and prevent clumps.
Remove the chicken from the buttermilk and let any excess drip off. Working in batches if needed, shake each thigh gently in the flour mixture, tapping off any excess. Don't press the coating onto the chicken—this prevents an even layer and can lead to a dense crust. Place the coated thighs on a wire rack set over a baking sheet to allow air circulation on all sides. Let them rest at room temperature for 30 minutes while you prepare the oil.
Heat the Oil to the Perfect Temperature
Fill a deep fryer or heavy pot with 4 cups vegetable oil to a depth of 2-3 inches. Use a thermometer to monitor the temperature—this is where precision matters most. Heat the oil to 350°F. If you don't have a thermometer, test the oil by dropping in a small piece of bread: it should sizzle and turn golden in 30-45 seconds. Too hot, and the crust will burn before the chicken cooks through; too cool, and you'll end up with greasy, soggy results.
Once the oil reaches temperature, carefully lower the chicken into the fryer using tongs or a spider skimmer. Don't overcrowd the pot—fry in batches if necessary to maintain the oil temperature. The chicken should float to the surface within 30 seconds. This is your signal that the oil is properly heated and the coating is properly adhered.
Fry to Golden Perfection
Fry the chicken for 12-15 minutes, turning occasionally with tongs, until the skin is a deep, golden brown and the internal temperature reaches 165°F. The crust should be crispy enough to shatter slightly when you press it gently with tongs. If the oil temperature drops below 325°F during frying, increase the heat and add 1-2 minutes to the cooking time.
Transfer the fried chicken to a wire rack set over a paper towel-lined baking sheet. Let it rest for 5 minutes before serving. This resting period allows the juices to redistribute throughout the meat, ensuring that each bite is as juicy as the first. Serve immediately while the crust is at its crispiest, and enjoy the perfect balance of texture and flavor that makes this recipe a blue ribbon winner.
Pro Tips For Making Blue Ribbon Fried Chicken
- Double-Dip the Cornstarch: DESCRIPTION: Mix your flour and cornstarch separately first—then combine. I learned this the hard way after clumpy batches ruined my crust. The cornstarch needs to stay fine, and this keeps it from forming lumps when you add buttermilk later.
- Salt the Buttermilk Hard: DESCRIPTION: Add 1½ tablespoons of kosher salt per cup of buttermilk—more than you’d think. My grandmother swore by this, and it makes the crust crispier and the meat juicier. (Yes, even if you’re impatient like me.)
- Fry in Batches of Three: DESCRIPTION: Don’t overcrowd the oil—three pieces max per batch. I used to fry six at once, and the temperature dropped like a rock, giving me soggy instead of golden-brown chicken. Patience here guarantees a better crust.
- Rest the Thighs Before Frying: DESCRIPTION: Let the buttermilk-marinated thighs sit uncovered in the fridge for at least 4 hours—or overnight if possible. This isn’t the prettiest method, but it works: the salt and acid penetrate deeper, and the crust sticks like glue. (Your future self will thank you.)
Common mistakes when making this dish
Overcrowding the Fryer
This is the #1 mistake I see in home kitchens—dropping too much chicken into the oil at once. When you overcrowd, the oil temperature plummets, causing greasy, unevenly cooked pieces. I’ve fried batches that took 20 minutes instead of 12 just because the oil couldn’t recover.
The fix? Fry in 2-3 pieces at a time—no more. Use a spider skimmer to lower them in gently, and wait until the oil returns to 350°F before adding more. Trust me, the extra 5 minutes of waiting saves you from soggy, undercooked chicken. 🔥
Skipping the Resting Time
I get it—you’re starving and that golden crust looks irresistible. But cutting the 5-minute rest before serving is a game-changer for juiciness. Without it, the juices pool at the bottom of the meat, leaving you with dry bites.
I once served fried chicken immediately after frying, and even my most loyal testers could taste the difference. Pro tip: Set a timer and resist the urge to dig in early. The wait ensures every bite is as tender as the first.
Uneven Oil Temperature
Fried chicken is all about that 350°F oil, but so many cooks guess or skip monitoring it entirely. I’ve seen people fry at 375°F (burnt crust) and others at 325°F (greasy mess). Invest in a deep-fry thermometer—they’re cheap and make all the difference.
No thermometer? Drop in a wooden chopstick: it should sizzle and turn golden in 30-45 seconds. If it burns instantly, your oil’s too hot. If it barely bubbles, it’s too cool. Adjust your heat source accordingly.
Not Drying the Chicken
Wet chicken = soggy crust. I’ve ruined batches by skipping the pat-dry step with paper towels, and the results were disappointing. The moisture steams the flour coating, preventing that perfect crisp. After brining, pat those thighs completely dry—even the skin.
Use two layers of paper towels if needed. This might seem tedious, but it’s what separates good fried chicken from great. I promise you’ll notice the difference in the crunch. ✨
Using the Wrong Oil
Vegetable oil is your best friend here, but I’ve seen people reach for olive oil or canola, and it shows. Olive oil has a low smoke point and burns easily, while canola lacks the neutral flavor needed for crispiness.
Stick with vegetable oil, peanut oil, or avocado oil—they handle the heat and stay neutral. And no, shortening isn’t a substitute. The oil needs to be hot enough to cook the chicken through while creating that golden crust.
If you’re using peanut oil, just be mindful of allergies if serving guests.
Double-Dredging Done Wrong
Double-dredging is the secret to that ultra-crispy crust, but many cooks either skip it or do it sloppily. Here’s how to nail it: After the first flour dip, let the chicken rest for 5 minutes to let the buttermilk soak in.
Then, dip again in buttermilk (just a quick coat), followed by another flour dredge. The key is gentle shaking to avoid compacting the coating. I’ve seen people press the flour on too hard, which creates a dense, heavy crust instead of the light, shatterable one we want.
Let gravity do the work—tap off excess flour instead of packing it on.
Nutrition facts
Frequently asked questions
Can I use chicken breasts instead of thighs?
Chicken breasts work but require extra care to stay juicy. Use bone-in, skin-on breasts and reduce frying time to 8-10 minutes (they cook faster). Brine them 6-8 hours max—longer can make them too tender. For best results, cut breasts in half horizontally to create even-sized pieces.
How do I keep the crust crispy after serving?
Transfer fried chicken to a wire rack in a 200°F oven for 10-15 minutes before serving. This keeps it warm while maintaining crispiness. For leftovers, reheat in a 400°F oven for 15 minutes—never microwave, as it turns the crust soggy.
What's the best way to store leftover fried chicken?
Store in an airtight container for 3-4 days in the fridge. For longer storage, freeze for up to 3 months. To reheat, bake at 400°F for 15 minutes—this restores crispiness better than frying again. Never refry from frozen, as it makes the coating greasy.
Can I make this gluten-free?
Yes! Replace the flour with a 1:1 gluten-free flour blend (like Bob's Red Mill) and add 1 tablespoon cornstarch per cup of flour for extra crispiness. Use the same double-dredging method, but let the coating rest 10 minutes between layers to help it adhere better.
Why did my chicken turn out greasy instead of crispy?
Greasy chicken usually means the oil was too cool (below 325°F) or overcrowded. Use a thermometer and fry in 2-3 pieces at a time. Also check your oil type—peanut or vegetable oil works best. If your coating fell off, you may not have let the buttermilk soak in long enough between dredges.