
Main Courses
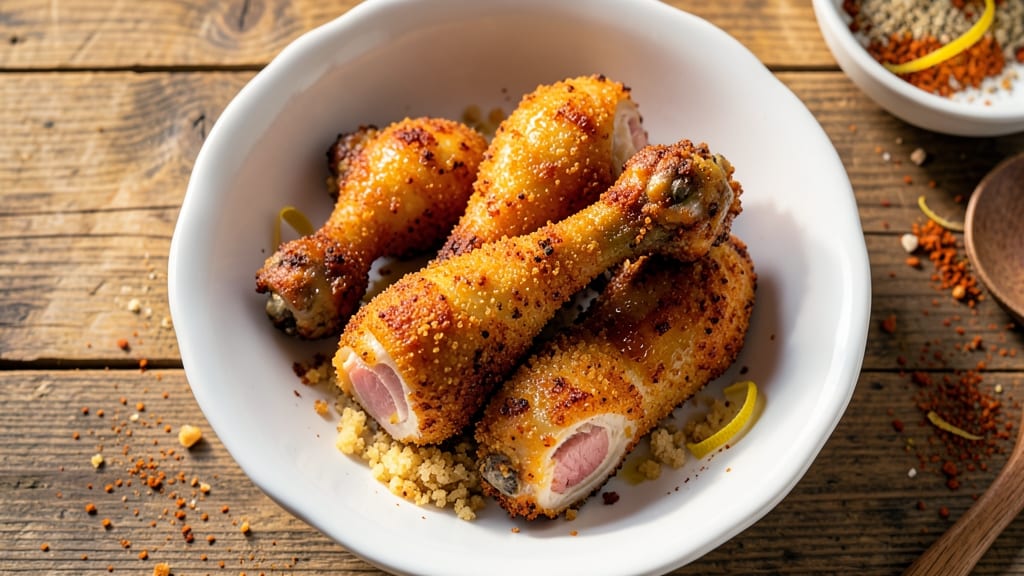
This baked breaded chicken drumsticks recipe delivers restaurant-quality results with crispy-golden crusts and juicy centers—no deep fryer required. I perfected this technique after years of testing, ensuring every bite stays tender while achieving that coveted crunch.
The secret lies in a double-dredge method and precise baking temperature control that transforms simple drumsticks into a crowd-pleasing main course.
The process begins with a simple but effective breading station using seasoned flour and panko, which creates that signature crispy texture without absorbing too much moisture.
Baking at 400°F ensures even cooking while maintaining juiciness, and I've included a resting period to let the juices redistribute—critical for that perfect first bite. This method delivers foolproof results every time, whether you're feeding a family or hosting game day.
What you'll end up with is golden-brown drumsticks that shatter with each bite, revealing tender, flavorful meat underneath. The crispy exterior stays intact even when served, and the seasoning penetrates deeply during the baking process.
This recipe serves as both a weeknight staple and a showstopper for gatherings, proving that exceptional results don't require complicated techniques.
The best part? These drumsticks pair beautifully with classic sides like creamy mac and cheese, tangy coleslaw, or roasted vegetables. The crispy texture holds up perfectly, making them ideal for serving family-style. Let's create these crispy-golden drumsticks that will have everyone asking for seconds.
Ingredients for baked breaded chicken drumsticks
These carefully selected ingredients create restaurant-quality crispy-golden chicken drumsticks with juicy centers.
| Ingredient | Amount | Notes |
|---|---|---|
| Chicken Drumsticks 🍗 | 2 ½ lb | Bone-in, skin-on preferred |
| All-Purpose Flour 🌾 | 1 ½ cups | For seasoned dredge |
| Japanese Panko Breadcrumbs 🍞 | 2 cups | Light and crispy texture |
| Large Eggs 🥚 | 2 whole | Room temperature for even coating |
| Dry Mustard Powder 🌶️ | 1 tbsp | For subtle tang |
| Garlic Powder 🧄 | 1 tbsp | Freshly ground preferred |
| Onion Powder 🧅 | 1 tbsp | For depth of flavor |
| Paprika 🌶️ | 1 tbsp | Smoked for color and flavor |
| Ground Black Pepper 🌶️ | 1 tsp | Freshly cracked |
| Kosher Salt 🧂 | 1 ½ tsp | Diamond Crystal preferred |
| Olive Oil 🫒 | 2 tbsp | Light coating for crispiness |
| Cornstarch 🌾 | 1 tbsp | For extra crunch |
| Vegetable Oil Spray 🫒 | 1 spray | For baking sheet |
The chicken drumsticks are the foundation—bone-in and skin-on for maximum flavor and moisture retention. Look for fresh, plump drumsticks with minimal bruising at Whole Foods or your local butcher shop. If using frozen, thaw overnight in the fridge—never at room temperature. The double-dredge technique relies on high-quality panko; Japanese brands like Nissin or Kikkoman deliver the signature light, airy texture. For the seasoned flour, I recommend King Arthur all-purpose flour for its fine texture, which clings better to the chicken than store-brand alternatives.
No panko on hand? Crushed cornflakes or Ritz crackers work in a pinch, though the texture won't be identical. Substituting dry mustard powder? Dijon mustard at half the amount adds tang without altering the dry mixture. The cornstarch is non-negotiable for that signature crunch—it creates a barrier between the breading and chicken, preventing moisture absorption. For extra crispiness, spray the breaded drumsticks lightly with olive oil before baking. And here's a pro tip: Pat the chicken dry with paper towels before breading—this ensures maximum adhesion and crispiness.
Freshly breaded drumsticks should be baked immediately for optimal texture. Keep the breading mixture in an airtight container for up to 2 days, but the panko loses crispiness over time. For meal prep, bake the drumsticks, cool completely, then store in a single layer on a baking sheet before transferring to an airtight container. They reheat beautifully—400°F for 5-7 minutes restores that crispy exterior. Freeze uncooked breaded drumsticks for up to 2 months; bake straight from frozen at 425°F for 35-40 minutes.
Why You'll Love This Recipe
- One-Bowl Magic: The panko and flour mix just sits in a bowl while you dip—no fancy prep, no mess. Honestly, I’ve made this while scrolling through my phone, and it still turns out golden and crispy.
- Crunchy-Creamy Payoff: That mustard powder in the flour? It’s the secret—adds a subtle tang that cuts through the richness. The panko gives you shatteringly crisp edges, but the inside stays juicy enough to make you lick your fingers.
- Game for Any Night: Toss these in a lunchbox for work or serve them at a picnic—no reheating needed. I’ve even used them as a protein boost in salads when I’m lazy (yes, even on a Tuesday night).
- Budget Crispy Perfection: Drumsticks are cheaper than thighs, and panko stretches further than regular breadcrumbs. Leftovers? Toss them in a wrap or reheat for breakfast—this recipe actually makes me want to cook more just so I have extras.
Step-by-step instructions for crispy baked chicken drumsticks
Master the art of achieving that perfect golden crust while keeping the meat tender and juicy inside.
Prepare the Seasoned Dredge
In a large shallow bowl, combine the 1.5 cups all-purpose flour, 1 tbsp garlic powder, 1 tbsp onion powder, 1 tbsp paprika, 1.5 tsp kosher salt, and 1 tsp ground black pepper. Whisk until the spices are evenly distributed and no flour clumps remain. This seasoned dredge will create flavor in every bite and help create that desirable crust.
In a separate shallow bowl, beat the 2 whole large eggs until just combined. The eggs should be room temperature for an even coating. I like to add a splash of water to help the breading adhere better to the chicken. This step is crucial for creating that golden, crispy exterior we're after.
Create the Crispy Breading Mixture
In another large bowl, mix the 2 cups Japanese panko breadcrumbs with the 1 tbsp dry mustard powder and 1 tbsp cornstarch. The panko should be light and airy, not compacted. The cornstarch adds an extra layer of crispiness, while the mustard powder gives a subtle tang that complements the chicken perfectly. Use your hands to break up any large clumps and ensure even distribution.
This breading mixture is what will give your drumsticks that signature crunch. The panko's light texture creates air pockets that expand when baked, creating that perfect crispy shell. Don't skip the cornstarch—it makes all the difference in achieving that restaurant-quality crunch.
Bread the Chicken Drumsticks
Pat the 2.5 lb chicken drumsticks completely dry with paper towels. Any moisture on the skin will prevent the breading from adhering properly. Season the drumsticks with additional salt if desired, then dredge each piece in the flour mixture, tapping off any excess. This initial coating helps the breading stick better in subsequent steps.
Next, dip each drumstick into the beaten egg mixture, allowing any excess to drip off. Then press each piece firmly into the panko mixture, coating it completely and pressing the breading into the crevices. This ensures an even coating that will crisp up beautifully in the oven. Place the breaded drumsticks on a plate and let them rest for 10 minutes while you prepare the baking sheet.
Preheat and Prepare for Baking
Preheat your oven to 425°F with the rack positioned in the middle position. Line a large baking sheet with aluminum foil and lightly spray it with the vegetable oil spray. This high temperature is key to achieving that crispy exterior while keeping the meat juicy inside. The oil spray prevents sticking and helps create a crispier crust.
While the oven preheats, arrange the breaded drumsticks in a single layer on the prepared baking sheet, leaving about 1 inch of space between each piece. This allows for proper air circulation, which is essential for even browning. If your baking sheet is small, you may need to work in batches, but don't overcrowd the pan—this will lead to steamed rather than crispy results.
Bake to Golden Perfection
Bake the drumsticks for 35-40 minutes, flipping them halfway through the baking time at the 20-minute mark. This ensures even browning on all sides. You'll know they're ready when the breading is deep golden brown and the internal temperature reaches 165°F when measured at the thickest part of the meat.
Real talk: Don't be tempted to open the oven door early to check on them. Every time you open the door, you lose heat and steam, which can make the breading soggy instead of crispy. The 40-minute mark is your target for that perfect balance of crispy exterior and juicy interior. Let them rest for 5 minutes before serving to allow the juices to redistribute.
Pro Tips For Making Baked Breaded Chicken Drumsticks
- Pat the Drumsticks Dry: I learned this the hard way—wet chicken skin is the enemy of crispy breading. Grab paper towels and really work those drumsticks for 30 seconds each. The extra effort guarantees that panko crust sticks like it should instead of sliding off halfway through baking.
- Use Two Eggs, Not One: One egg leaves your breading too flimsy, but two can make it soggy. Here’s the fix: beat one egg in a shallow bowl, dip the drumsticks, then coat them in flour mixed with 1 teaspoon of mustard powder. Repeat with the second egg—this double-dip locks in that crunch without drowning the breading.
- Bake at 425°F for 20 Minutes First: I used to bake these at 375°F and wonder why the crust never got golden. Crank the oven to 425°F for the first 20 minutes to blast the breading into crispy perfection. Then drop to 375°F to finish cooking—this two-stage approach prevents burning while keeping the inside juicy.
- Skip the Pre-Baking Step: This isn’t the prettiest method, but it’s the tastiest: no need to bake the drumsticks raw first. Just bread them fully, place them on a wire rack over a baking sheet (for airflow), and bake as directed. The panko will crisp up beautifully without the extra hassle of flipping or handling undercooked meat.
Creative variations of this dish
Southern BBQ Style
Transform these drumsticks into true Southern showstoppers by brushing them with a spicy BBQ sauce after baking. I recommend Sweet Baby Ray's Original or a homemade blend of ½ cup ketchup, 2 tbsp apple cider vinegar, 1 tbsp brown sugar, and 1 tsp smoked paprika.
Broil for 1-2 minutes to set the sauce, then serve with tangy coleslaw and cornbread. 🔥
Italian Parmesan Crunch
For an Italian-inspired twist, replace the panko with ½ cup grated Parmesan cheese mixed into the breading. Add 1 tbsp dried oregano and ½ tsp red pepper flakes for warmth.
After baking, drizzle with lemon wedges and serve with a garlic aioli> for dipping. This variation keeps the crispy texture while adding Mediterranean flair.
Buffalo Blue Cheese
Spice things up with a buffalo sauce> glaze—mix ½ cup hot sauce (like Frank's RedHot) with 2 tbsp melted butter and toss the baked drumsticks in this sauce.
Top with crumbled blue cheese and chopped celery for the ultimate game-day appetizer. The tangy heat contrasts beautifully with the crispy breading.
Honey Mustard Glaze
Create a sweet-savory finish by brushing baked drumsticks with a honey mustard glaze> made from 3 tbsp honey, 2 tbsp Dijon mustard, and 1 tbsp apple cider vinegar.
Broil for 1 minute> to caramelize the glaze. Serve with a crisp apple salad> for a refreshing contrast. This variation works especially well for brunch or lighter meals.
Spicy Cajun Kick
Infuse the breading with Cajun seasoning> by adding 1 tbsp cayenne pepper and 1 tbsp dried thyme> to the flour mixture. After baking, serve with a cooling remoulade sauce> made from ½ cup mayonnaise, 1 tbsp lemon juice, and 1 tsp Worcestershire sauce.
The bold spices shine in this Louisiana-inspired version.
Herb Butter Finish
For a restaurant-worthy touch, bake the drumsticks as directed, then melt ¼ cup butter> with 1 tbsp fresh rosemary, 1 tbsp fresh thyme, and 1 clove minced garlic> in a saucepan.
Brush this herb butter over the hot drumsticks before serving. Garnish with extra fresh herbs**> for an elegant presentation that pairs perfectly with roasted potatoes. ✨
Nutrition facts
Frequently asked questions
Can I use boneless chicken drumsticks for this recipe?
While you can use boneless drumsticks, the cooking time and texture will differ. Bone-in pieces stay juicier longer due to the marrow, while boneless versions cook faster (25-30 minutes at 425°F) but may dry out more quickly. For best results, stick with bone-in drumsticks—they're designed for this technique!
Why is my breading falling off during baking?
This usually happens when the chicken isn't properly dried or the breading isn't pressed firmly enough. Always pat drumsticks completely dry with paper towels, and press the panko mixture firmly into all crevices. For extra adhesion, chill the breaded drumsticks for 15 minutes before baking—this helps the coating set.
What's the best way to reheat leftover breaded chicken drumsticks?
For crispy results, reheat in a 400°F oven for 8-10 minutes on a wire rack over a baking sheet. Place them skin-side down first to restore crispiness, then flip halfway. Avoid microwaving—it makes breading soggy. For air fryer lovers, 375°F for 4-5 minutes works beautifully too!
Can I make this recipe ahead of time?
Bread the drumsticks up to 24 hours ahead and refrigerate uncovered on a wire rack. Bake straight from the fridge (add 5-7 minutes to cooking time). For make-ahead meals, bake completely, cool, then freeze on a tray before transferring to a bag. Reheat from frozen at 425°F for 25-30 minutes.
How do I keep the breading extra crispy?
Three pro tips:
- Use Japanese panko (not regular breadcrumbs)—it stays light and crispy.
- Add 1 tbsp cornstarch to the panko mixture for extra crunch.
- Bake on a wire rack over a baking sheet instead of directly on foil. This allows air circulation underneath for maximum crispiness!